Yoga for Heel Pain Relief
Heel pain is a common condition caused by various factors, including plantar fasciitis, heel spurs, and overuse injuries. The plantar fascia is a thick band of tissue that runs along the bottom of the foot and connects the heel bone to the toes. When this tissue becomes inflamed or strained, it can cause pain in the heel and arch of the foot. Heel spurs are small bony growths that can form on the heel bone and cause pain when walking or standing. Overuse injuries, such as those sustained by runners or athletes, can also lead to heel pain.
The good news is that yoga can effectively alleviate heel pain and improve overall foot health. Yoga promotes flexibility and strength in the feet and lower legs, which can help to support the arches and alleviate strain on the plantar fascia. In addition, the mind-body connection cultivated through regular yoga practice can help reduce stress and promote relaxation, both of which can contribute to pain relief.
Yoga Poses for Heel Pain
Several yoga poses can be particularly helpful for relieving heel pain. These poses can be modified and adapted to accommodate different levels of flexibility and ability. It's important to listen to your body and modify poses as needed to avoid straining or overstretching.
Downward-Facing Dog
Downward-Facing Dog is a classic yoga pose that stretches and strengthens the entire body, including the feet and lower legs. To get into this pose, start on your hands and knees with your wrists under your shoulders and your knees under your hips. Spread your fingers wide and press firmly into the ground. Exhale and lift your knees off the ground, straightening your legs and lifting your hips up and back. Keep your feet hip-width apart and your heels pressing towards the ground. Hold for several deep breaths, then release back to your starting position.

Child's Pose
Child's Pose is a restorative and calming pose that can help to stretch and relax the feet. To get into this pose, start on your hands and knees with your wrists under your shoulders and your knees under your hips. Exhale and lower your hips back towards your heels, stretching your arms out in front of you. You can keep your arms straight, bend your elbows, and rest your forehead on the ground. Hold for several deep breaths, then release back to your starting position.
Triangle Pose
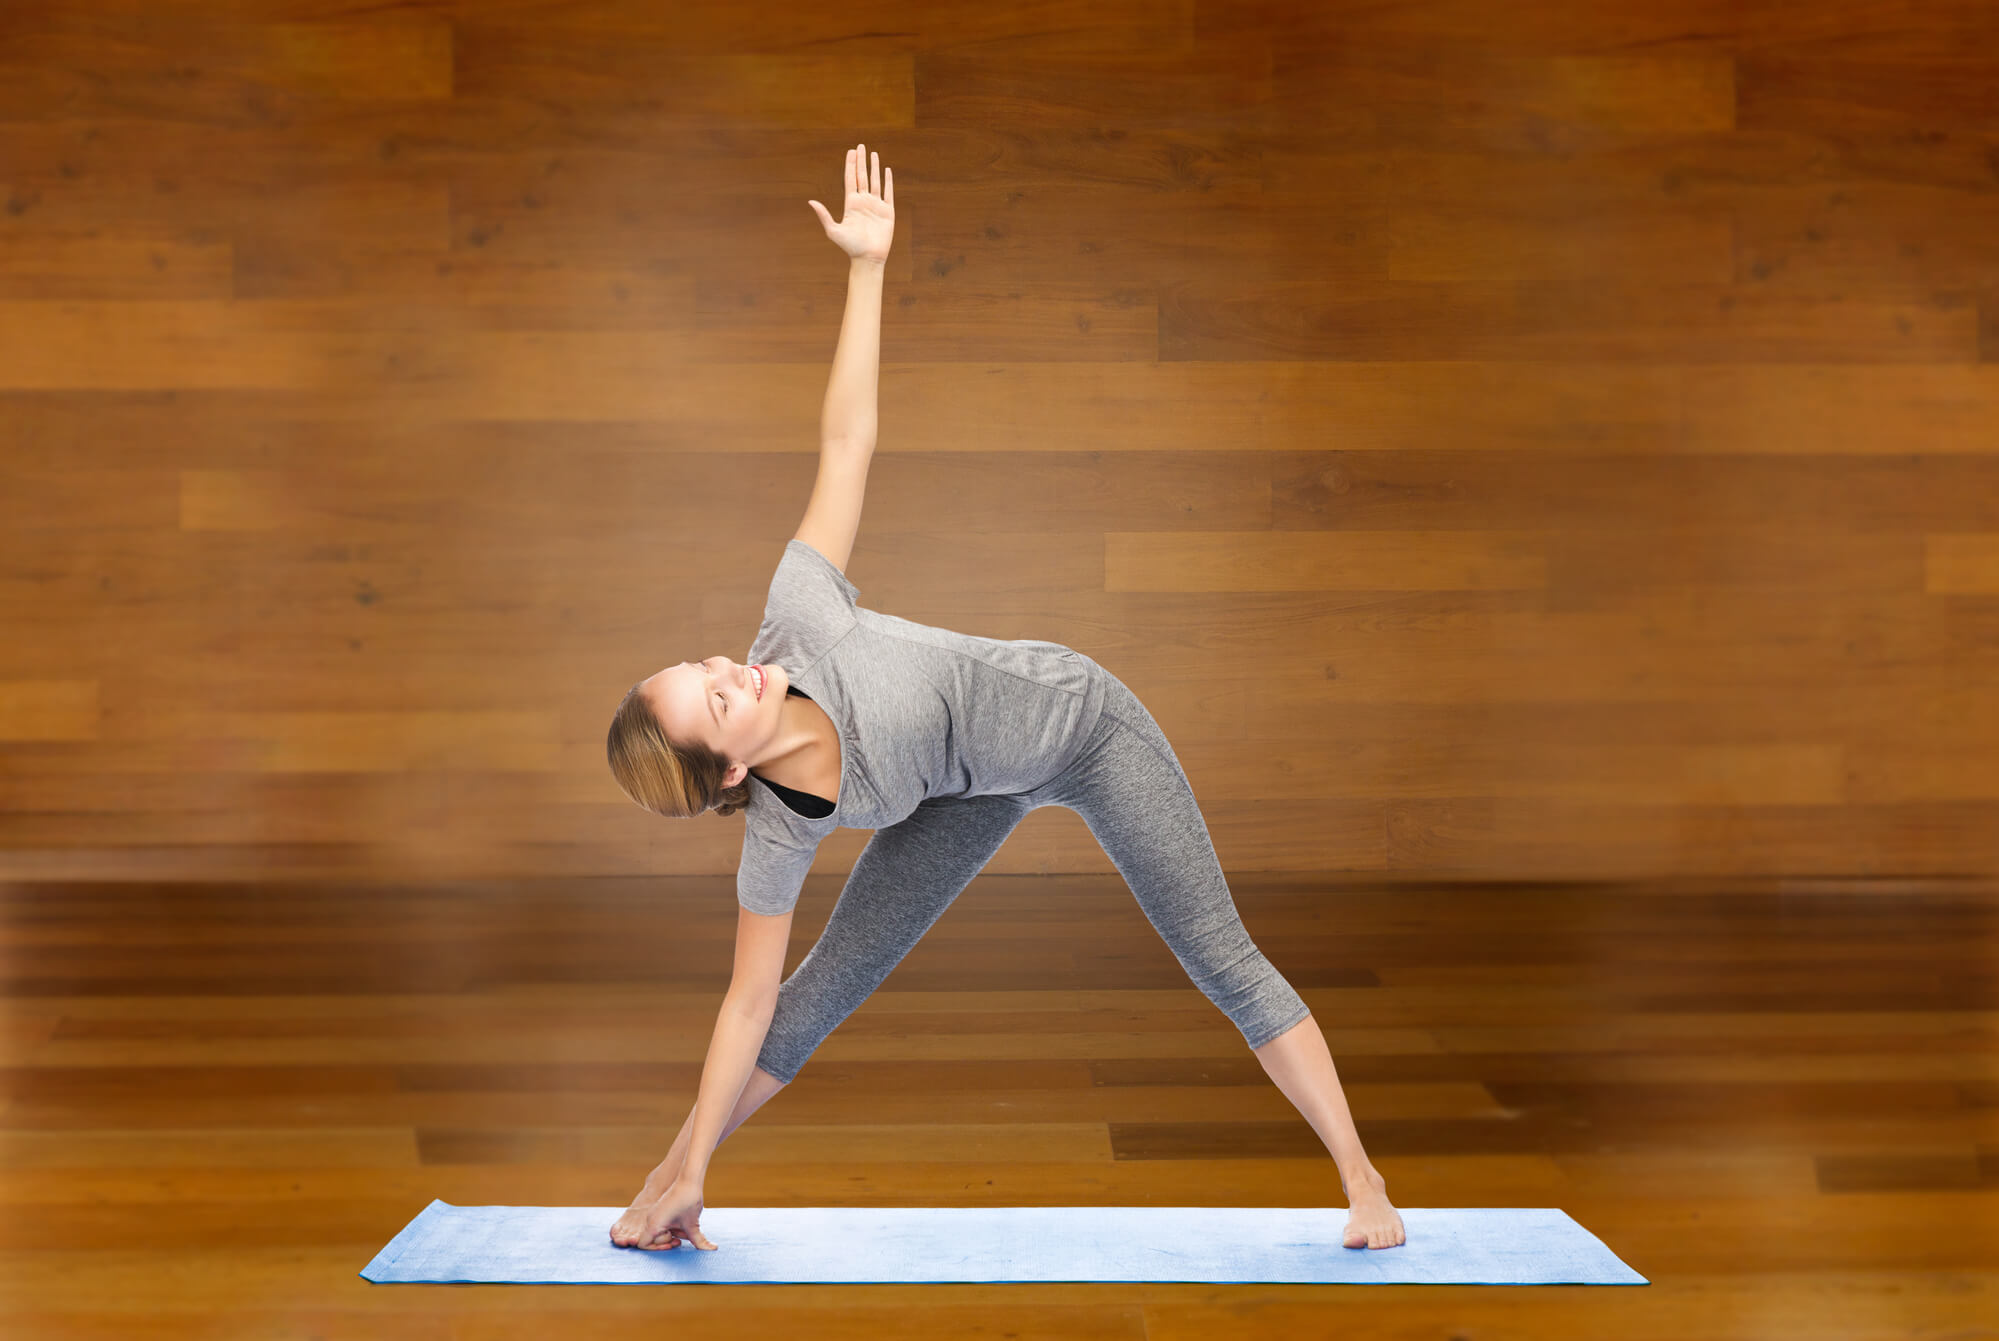
Triangle Pose is a standing pose that helps to strengthen and stretch the feet, ankles, and lower legs. To get into this pose, stand with your feet wide apart and your arms at your sides. Turn your right foot out to the side and your left foot slightly inward. Inhale and lift your arms to the sides, then exhale and bend your right leg, reaching your right hand down towards your right ankle or the ground. Keep your left leg straight, and your left arm extended towards the sky. Gaze up towards your left hand and hold for several deep breaths. To release, inhale and lift your torso back up to standing, then repeat on the other side.
Warrior I Pose
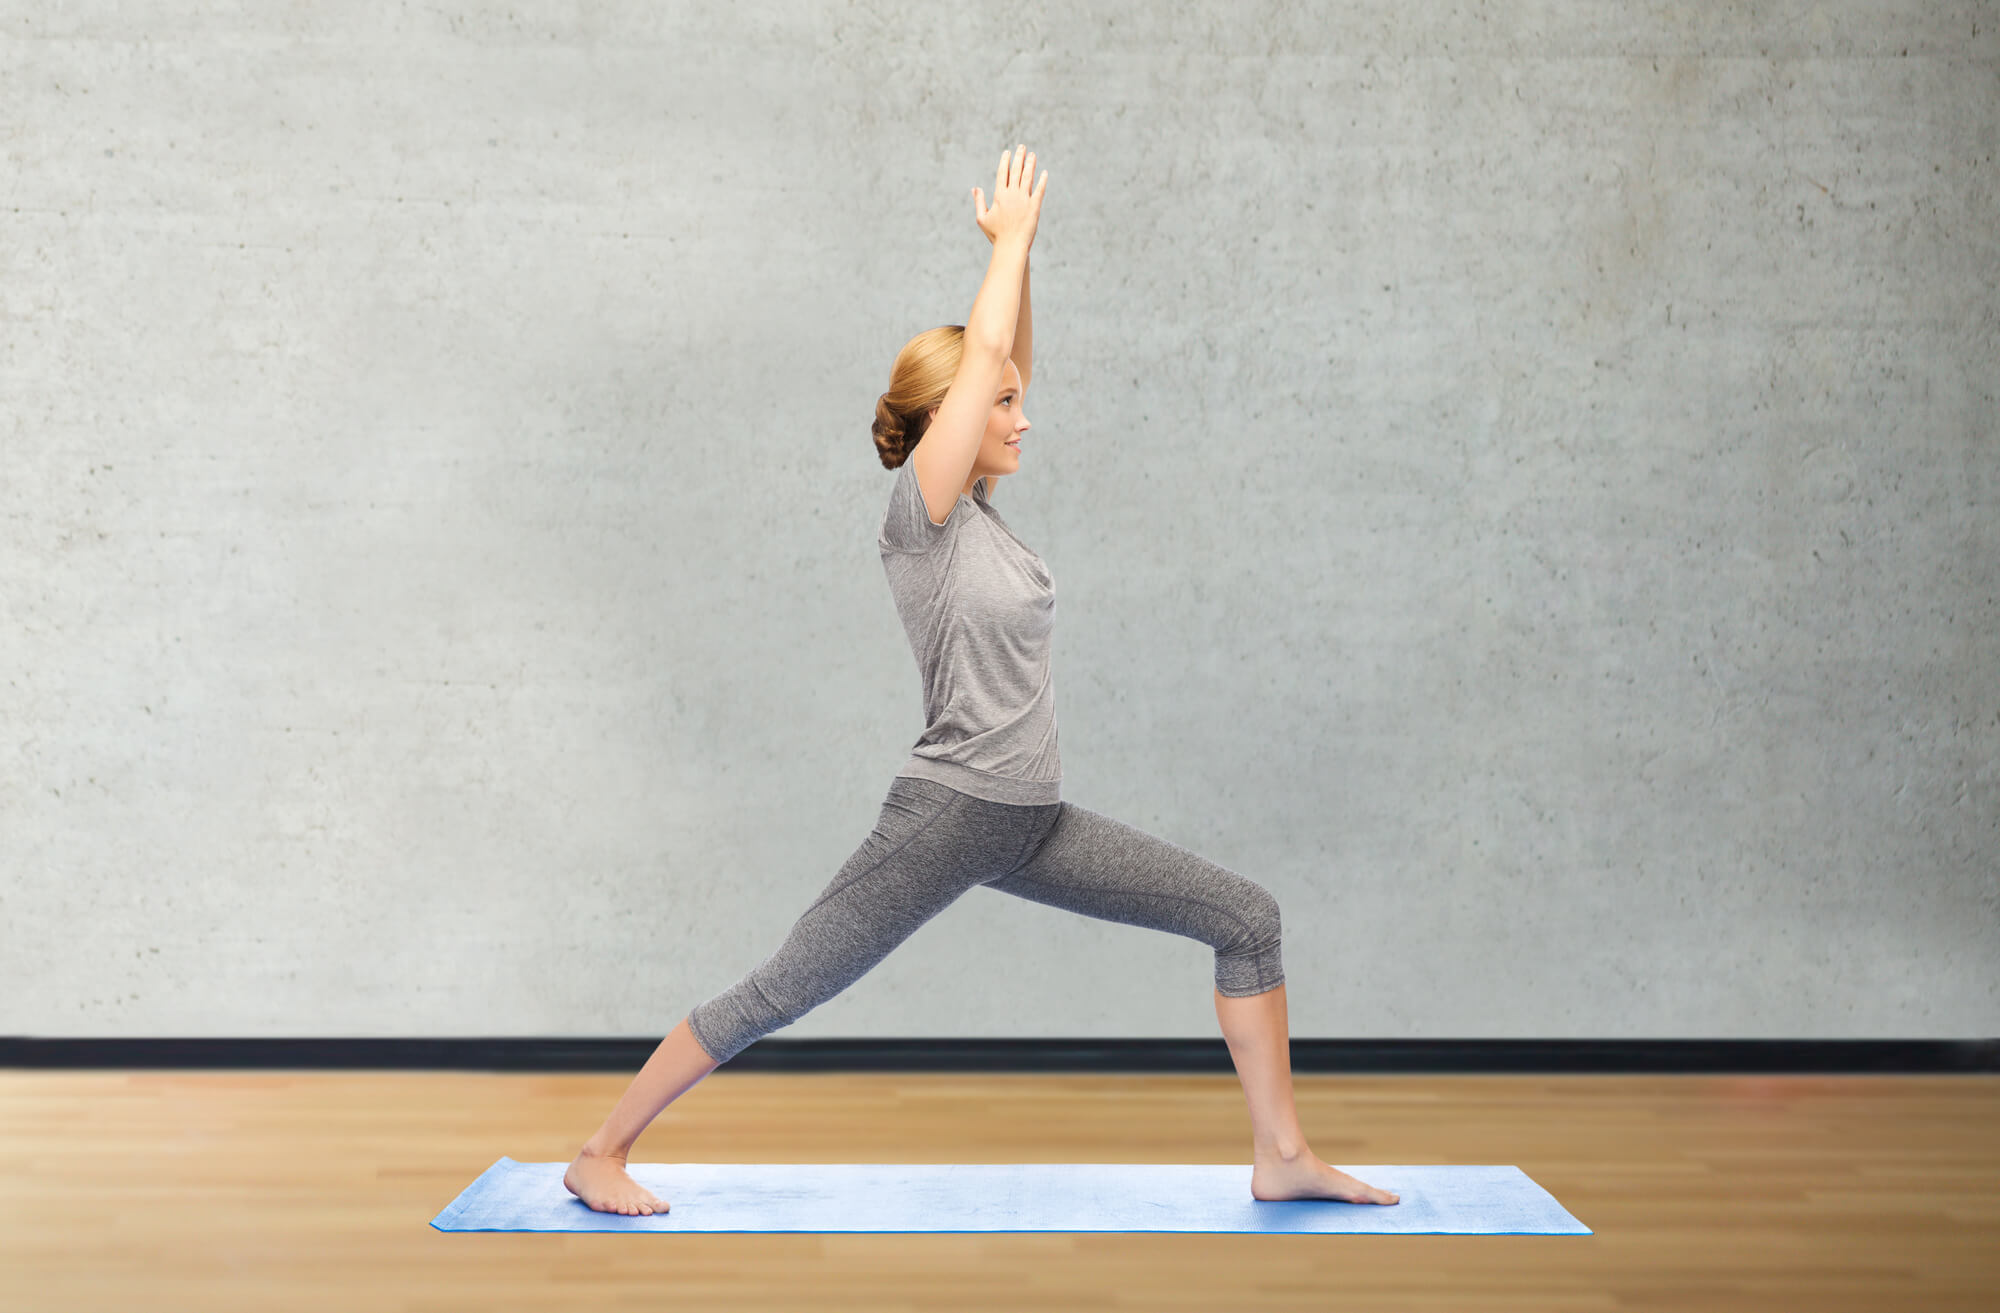
Warrior I Pose is a standing pose that helps to strengthen and stretch the feet and lower legs. To get into this pose, stand with your feet wide apart and your arms at your sides. Turn your right foot out to the side and your left foot slightly inward. Inhale and lift your arms up above your head, then exhale and bend your right leg, lowering your hips towards the ground. Keep your left leg straight and your arms extended upwards. Hold for several deep breaths, then release back to your starting position. Repeat on the other side.

Tree Pose
Tree Pose is a balancing pose that helps to strengthen and stretch the feet and lower legs. To get into this pose, stand with your feet hip-width apart and your arms at your sides. Shift your weight onto your left foot and lift your right foot off the ground, placing the sole of your right foot on your inner left thigh or calf. You can also place your foot on your ankle or inner left thigh, depending on your level of flexibility. Bring your hands to the prayer position at your chest, or extend your arms above your head. Hold for several deep breaths, then release back to your starting position. Repeat on the other side.
Modifications for Heel Pain
If you're experiencing heel pain, you may need to modify the above poses to reduce pressure on your heel. One option is to use props to support your heels, such as a yoga block or rolled-up blanket. For example, you can place a block under your heel in Downward-Facing Dog or Triangle Pose to take some of the weight off of your heel. You can also use a rolled-up blanket or cushion to support your heel in Child's Pose or Warrior I Pose.
Another option is to modify the pose to reduce heel pressure. For example, in Triangle Pose, you can keep your right hand on your right hip or a block instead of reaching down to your ankle. In Warrior I Pose, you can bend your left leg slightly and keep your right heel lifted off the ground. It's important to listen to your body and make these modifications as needed to avoid straining or overstretching.

Precautions and Considerations
As with any exercise program, it's important to consult a healthcare professional before starting a yoga practice, especially if you're experiencing heel pain. A podiatrist or other foot specialist can help diagnose the cause of your heel pain and recommend the best treatment.
It's also important to listen to your body and modify poses as needed to avoid straining or overstretching. If you experience sharp or shooting pain while practising yoga, stop immediately and seek medical attention.
Conclusion
Yoga can be a great way to find relief from heel pain and improve overall foot health. By incorporating specific poses into your practice that stretch and strengthen the feet and lower legs, you can help to alleviate strain on the plantar fascia and support the arches. Just be sure to consult a healthcare professional and listen to your body as you practice, modifying poses as needed to avoid straining or overstretching. Give these poses a try and see how they can help relieve heel pain.

